 Computers: HTML: PicturesComputers: HTML: Pictures
By the end of the previous stage, your web site had a main heading, subheadings, and text:
 Stage 2c: The mottosindex.html (2c): Click to see the page, or the code.
Usually, you will need to find your own pictures: pictures you've created using draw or paint programs, pictures taken using your own digital camera, pictures captured from books and magazines using a scanner, or pictures taken from the web.
For this site, however, the pictures you need are shown below. Download them into the same folder as your index.html file. If you are using Internet Explorer under Windows, you can doing this by moving the mouse pointer over each one in turn, clicking the right mouse button, and selecting Save picture as... from the menu which pops up. If you are using a different browser, check the help system or just experiment: most have some way of letting you download pictures like this.

lamppost.jpg
homemade-lamppost.jpg

foggy-lampposts.jpg
Pictures explain, enliven, move, and inform.
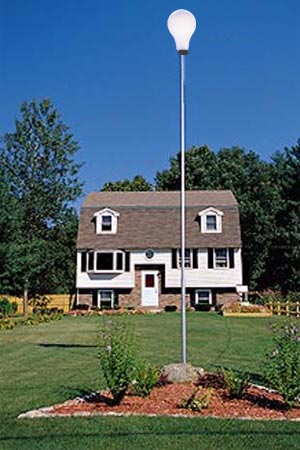
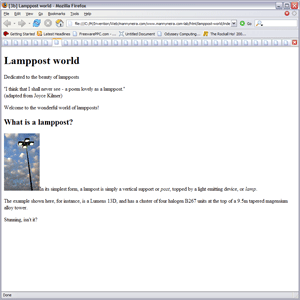
Moving from the sublime to the ridiculous, the answer to the question What is a lamppost? would be more helpful if it was accompanied by a picture of a lamppost. Open index.html, and just before the words In its simplest form..., add the following into the answer:
<img src="lamppost.jpg" id="lumens13d">
The <img> or image tag tells the browser to display a picture. You may remember that on the previous page we came across attributes. Well, here the <img> tag has been given two attributes. src="lamppost.jpg" tells the browser the source of the picture: in other words, the name of the picture file. id="lumens13d" gives this particular tag a name of lumens13d.
The line containing the <img> tag should now look like this:
<p><img src="lamppost.jpg" id="lumens13d">In its simplest form, a lampost is simply a vertical support or <em>post</em>, topped by a light emitting device, or <em>lamp</em>.</p>
 Stage 3a: A new pictureindex.html (3a): Click to see the page, or the code.
 There are dozens of different formats or file types for pictures: bmp, tiff, raw... but only three of them can be used on your web pages:
JPEG (Joint Photographic Experts Group) format pictures were originally designed to store photographs in compressed form: which they do well. If you compress an image too much, for instance, its appearance can start to degrade: but JPEG files support a variable level of compression, so that you can balance file size against picture quality. In general, for photographic images, use JPEG files. JPEG file names end in .jpg.
GIF (Graphic Interchange Format) format can only handle 256 colours in an image (far less than JPEG), and is not very good at compressing very complex images: for both of these reasons, JPEG is a better bet for photographs. However, it is good at compressing simple, abstract images, like company logos, or diagrams. It can also do two tricks that JPEGS cannot do. Firstly, parts of a GIF image can be made 'transparent', so that when you display them on your page whatever is underneath them shows through. Secondly, GIF files can store several images which it can then repeatedly flick through, thereby providing a simple form of animation. If you need transparency, or animation, or are displaying a logo, use GIF. GIF file names end in .gif.
PNG (Portable Network Graphics) format is better than GIF at displaying abstract or partly transparent images, and can compete with JPG in photographic images. However, it has two weaknesses. The first is minor: it does not support GIF animations, and so for those you'll have to continue to use the older format. The second is more important: fewer browsers can display PNG images, and even those that do don't always do it well. For instance, even the latest versions of Internet Explorer, the world's most popular browser, do not display transparent PNG images properly. Though it is up to you, for these reasons I would advise you to wait before using these: though it seems inevitable that they will gradually become the norm. PNG file names end in .png.
 Sadly, I cannot include a course on creating and editing pictures for your website: so I'll keep the advice brief. Illustrate your website with as many high quality, bright, interesting, and relevant images as you can find. Use your digital camera (or phone) to take pictures to illustrate your holiday blog, or your website about fascinating ferns. Learn to use photo-editing software to crop and improve your pictures. Learn to use painting and drawing programs to create diagrams and icons of your own. Don't just recycle pictures from other websites, be original, and be a contributor.
Conversely, avoid images which are poor quality, dull, or irrelevant. And always, always, make sure your pictures aren't bigger than they need be. At www.mannyneira.com, a limit of 32K is set on most images, and 100K on a few larger images. But in general, make sure each image file is as small as it can be without degrading the quality of the image. Again, good graphics software will help you properly prepare images for publication on the web.
Providing a little background information to your pictures can help to tie them into your text, and increase their interest yet further.
To this end, add the following after the line <h2>What is a lamppost?</h2> and before </body>:
<p>The example shown here, for instance, is a <span class="lamppost">Lumens 13D</span>, and has a cluster of four halogen B267 units at the top of a 9.5m tapered magensium alloy tower.</p>

<p>Stunning, isn't it?</p>
In the middle of this HTML, you may have noticed the tag <span class="lamppost">Lumens 13D</span>. In fact, a <span> tag just marks a span of text which has some special significance: it does not in itself affect the way that bit of text is displayed. It is similar to the <div> tag, which also simply marks part of the contents of a web page without affecting its display: the only difference being that while <div> surrounds a block of HTML lines, <span> surrounds only a bit of text within a single line.
Here, the span is given the attribute class="lamppost", to indicate that the span of text in question - Lumens 13D - is a lamppost model number. The class attribute is very similar to the id attribute. The difference is that while each id should be unique within a page, many tags can be part of the same class. Both id and class attributes may be assigned to any tag.
Using <div> and <span> tags with id and class attributes is an excellent way of documenting the meaning or structure of the content of your page: they can act as notes to yourself, or to others, when your pages are edited in the future. Also, in later stages of this tutorial, when you learn to apply fonts, colours, and positioning to the tags in making up your page, you will find that parts of the page marked by divisions and spans can be given special formatting: so you'll be able to set a consistent style for all lamppost model numbers.
As far as I know there's no such thing as a Lumens 13D lamppost.
 Stage 3b: Some more text about the pictureindex.html (3b): Click to see the page, or the code.
Now, turn to 4 tables to find out how to add tables of information to your pages.